The generic HTTP node, M2 API authentication, and some tips.
Table of Contents
Overview
This is a quick overview of how to use the n8n HTTP node to connect to the Magento 2 REST API. I’m using the Magento 2 REST API, but there is also GraphQL and any custom endpoints you may create that you could also utilize.
I was asked a couple great questions from a fellow developer a few weeks ago on this subject. I took note to share this because things like this, once you’re doing them daily, can be easy to forget how confusing they were when first using them.
The questions were preceded by some context I think most of us can relate to. When dealing with an API, you normally will be setting headers, and passing some sort of authentication. The authentication is usually a token of some sort, and the headers are usually a key/value pair. So,
- Where do we find this information for connecting to the Magento 2 REST API?
- How do we configure and ‘connect’ the HTTP node in n8n with this information?
The documentation for the Magento 2 APIs are thorough, but not necessarily clear on how or where to get your tokens. Newer versions disable bearer tokens by default, and expect you to use Oauth. Not Oauth 2 like everyone else, noo, Oauth1, just to make things interesting.
The documentation for the HTTP node for n8n is also thorough, but not necessarily clear on how to configure the node to work with Magento 2. I think one of the primary confusions is how you set generic authentication headers, closely followed by how the pre-defined Magento 2 credential type works with non Magento nodes.
Understanding the HTTP Node in n8n
The HTTP node is a generic node that can be used to connect to any API. It’s a great node to use when you need to connect to an API that doesn’t have a pre-defined node in n8n, or the API call you want to make isn’t in the node for your application. For example, the Magento 2 node doesn’t support the GET /V1/products/attributes endpoint. So, you would need to use the HTTP node for this.
Ok cool, so I’ll just open that node and, uh, what do I do with this? 
The key pieces to this node should be pretty self explanatory. You have your selection of Method types like Get, Post, Put, Delete, etc. You have your URL field, and then options for the headers, query parameters, and body.
Tip: you don’t need to set the content-type header if you select an explicit type from the “Body Content Type” dropdown. eg if you select “JSON” from the dropdown, the content-type header will be set to “application/json” automatically.
I wont dive into the simple things here- this nodes documentation will outline what all the thingies are.
Using the HTTP node with an API
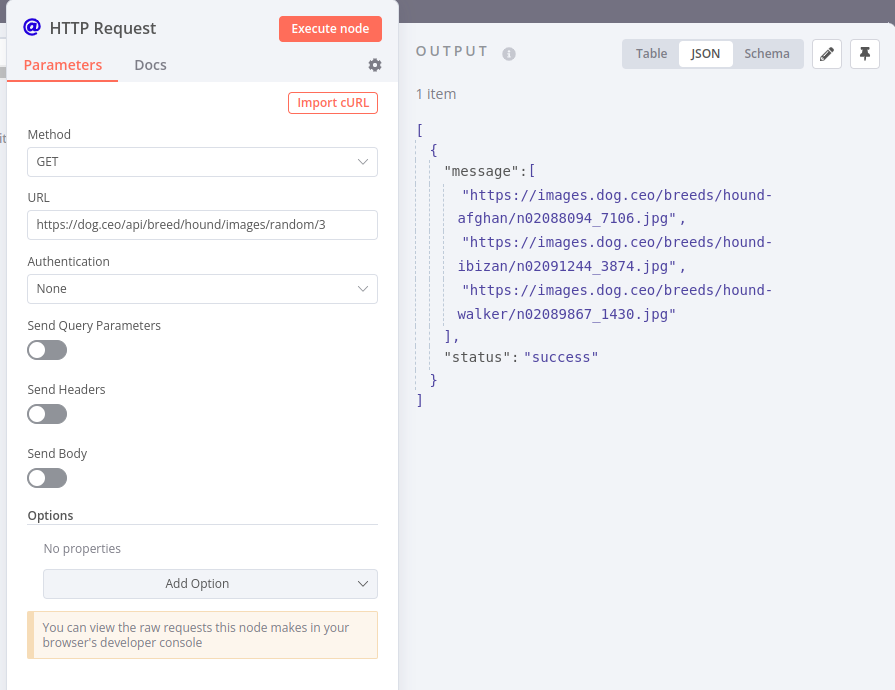
Just as a quick example, if we were to use this node with a REST api, let’s say dog.ceo - all we would really need to do is copy the GET request location into the URL field and hit execute:
If we wanted to include a bearer token, we COULD use the headers like this:
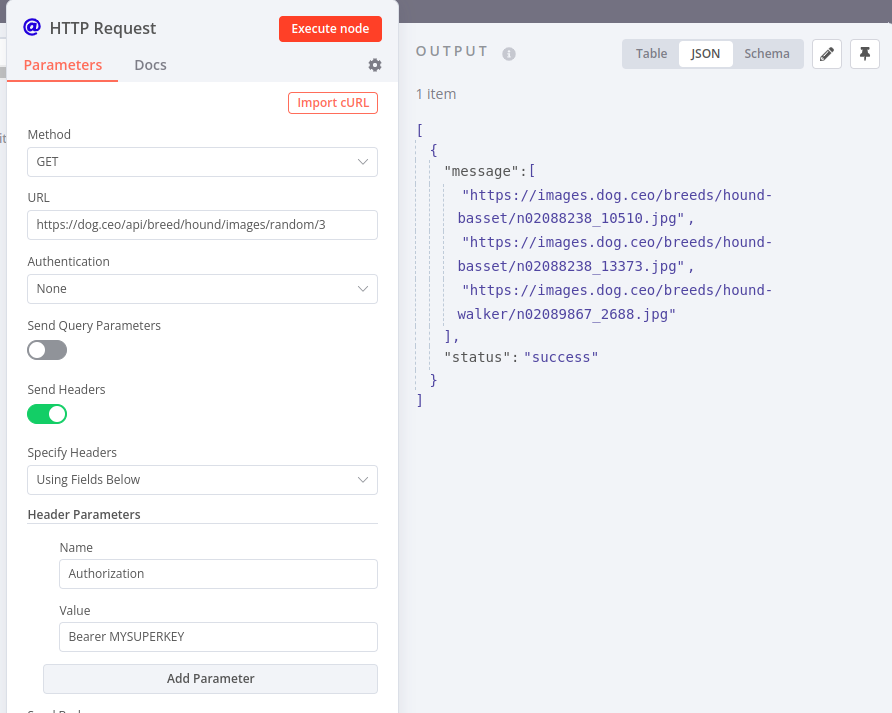
But there’s some security issues here. The key is stored in the workflow configuration in plaintext. This is a way to automate keys during some refresh process as well- but again, it’s probably better to find a way to use environment variables (You can do that!), or use the credentials system in n8n.
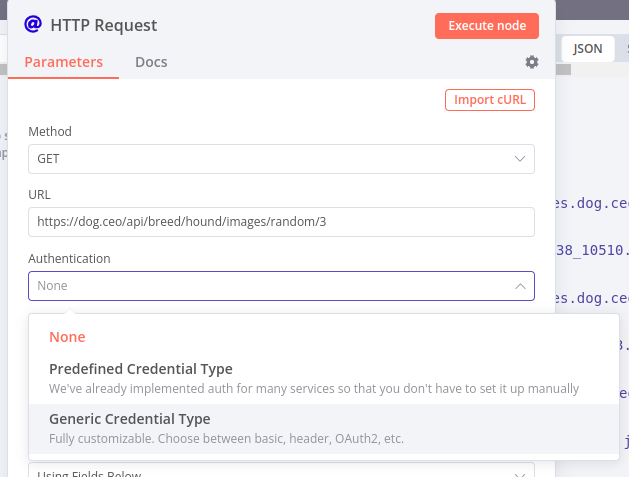
Using the HTTP node with n8n credentials
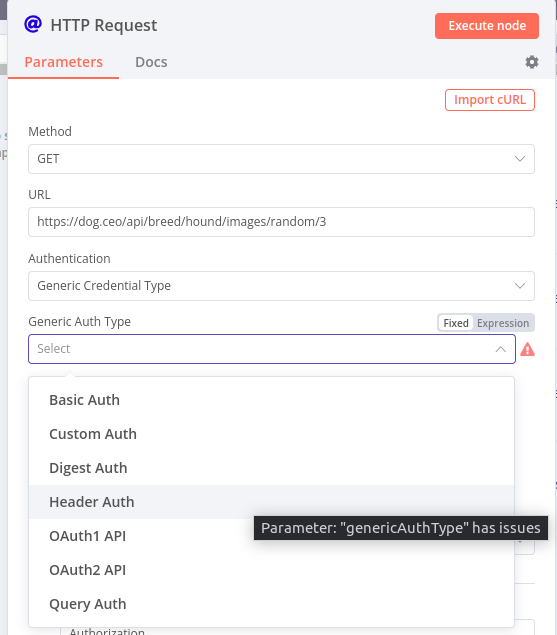
With our focus here being Magento 2 - I’ll focus on that credential type. You have many generic types which will work as well, and in this case if we wanted to use a generic type we would select “Generic Credential Type”, then “Header Auth”.
After clicking the new, blank, credential selector you can create a new one:
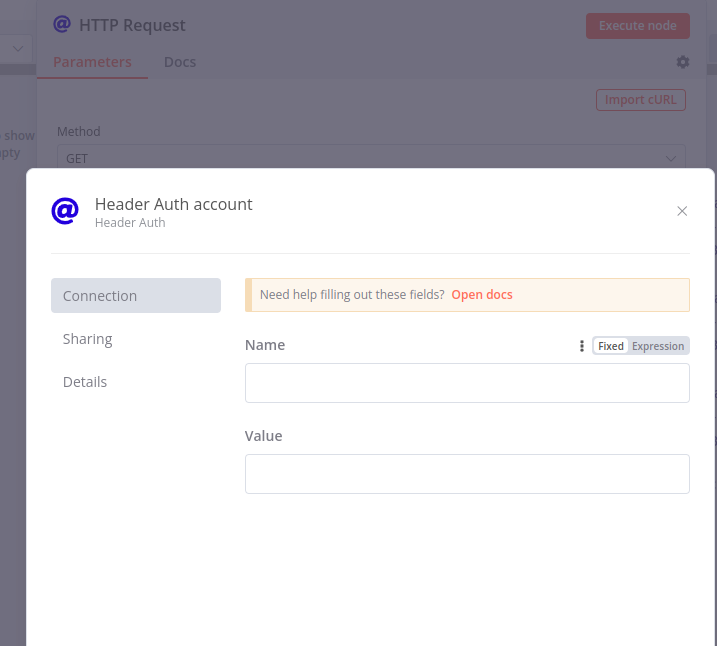
The “Name” would be Authorization and the “Value” would be Bearer YOURTOKEN (NO “:”):
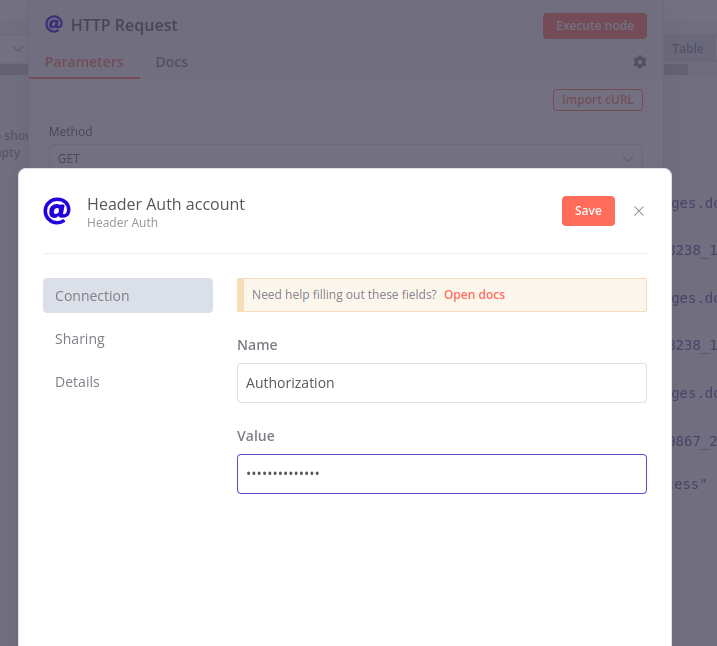
If you’re new to APIs and this type of thing, then it probably wouldn’t occur to you that behind those asterisks is multiple words with a space. Sometimes, with a long enough token, I’ll temporarily write it out in my closest text editor, and copy paste it in to reassure myself. eg Bearer mylongwindedtoken
You can repeat this process for pretty much all the credential types. Certain types are more complex than others, such as Oauth1 and 2. I will skip these for this post, for the sake of time. For automations like n8n, it’s much more reliable to allow bearer tokens, and assure your firewalls have the IP of n8n on the allow list.
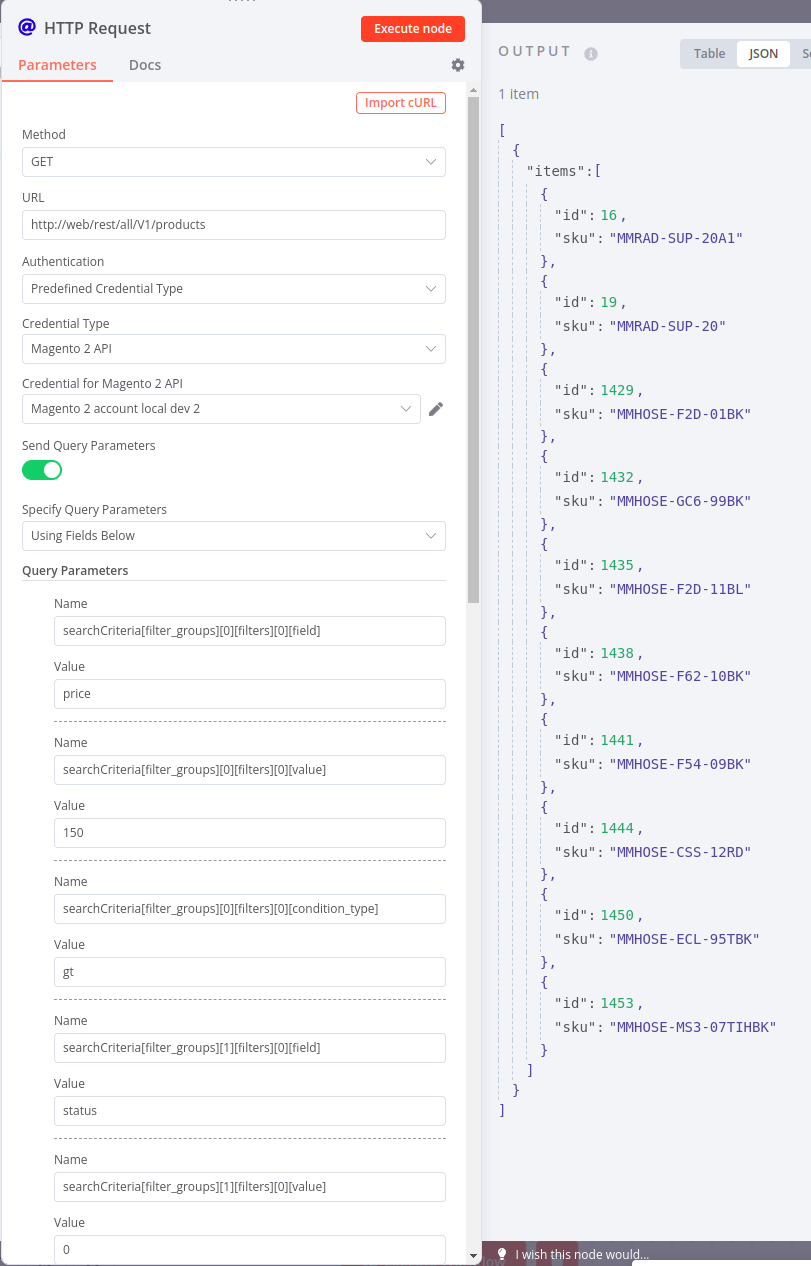
Using the HTTP node with Magento 2 Credentials
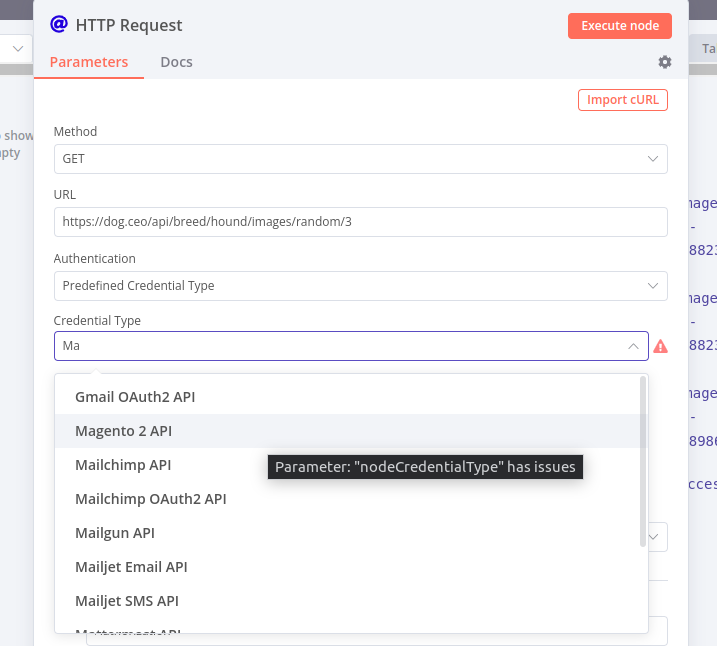
Just as the previous section, the Magento 2 “Predefined Credential Type” is simply a Header Auth form, that will contact the Magento 2 API address you give it to test the credentials.
So let’s back up a few steps- and select the “Predefined Credential Type” from the dropdown. Then search in the second dropdown for Magento:
Edit or create credentials to get the form:
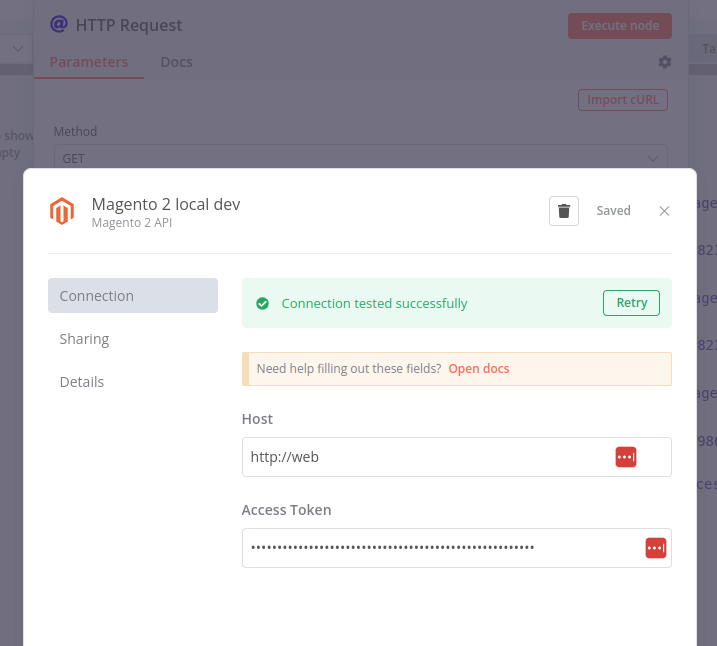
NOTE This is just your token, NOT Bearer yourtoken but just yourtoken.
You’ll notice my host is strange. http, and only web? This is because I’m using DDEV, which is a docker compose orchestrator for local development. It’s a great tool, and I highly recommend it. You can read more about it here, and I have a ddev boilerplate in my github for 2.4.6, and 2.4.5 using DDEV. But I digress, the point is my stuff is in docker containers, in the same project. So in my case, n8n and Magento 2 would see each other on the docker network not mine. Meaning, the easiest way to address the Magento 2 API is to use the container name. Most cases you’ll use your actual URL like https://yourMagento.com.
But wait.. Where does the access token come from?
Getting the Magento 2 Access Token
This is super easy, but be careful. Cutting access tokens with wide open privileges is dangerous. Be sure to make several integrations so you can partition which credentials can do what. Or not, I’m not your boss, but I need to mention it.
- Log in to your Magento 2 admin
- Go to System > Integrations
- Click “Add New Integration”
- Give it a name, and set the “Resource Access” to “All”, or define specific permissions.
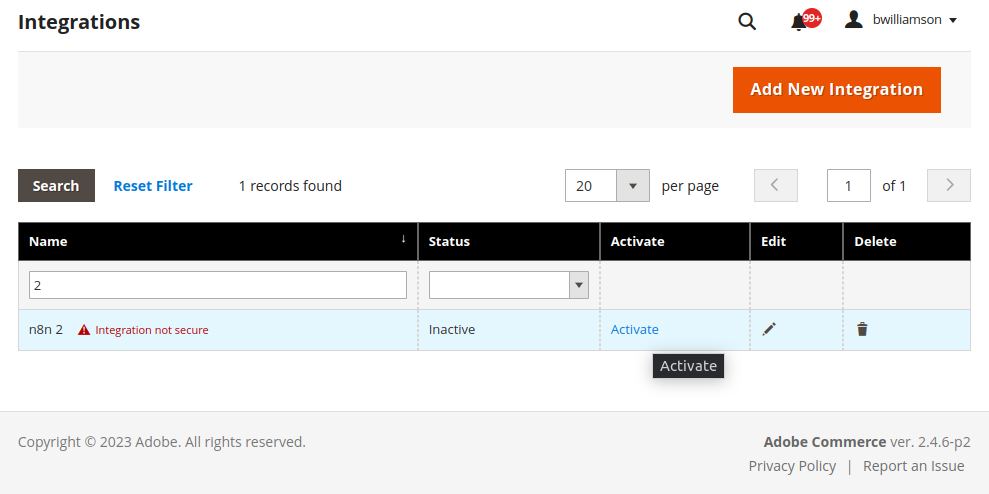
- Click “Save”
- Click “Activate”
![Magento integration before activation]()
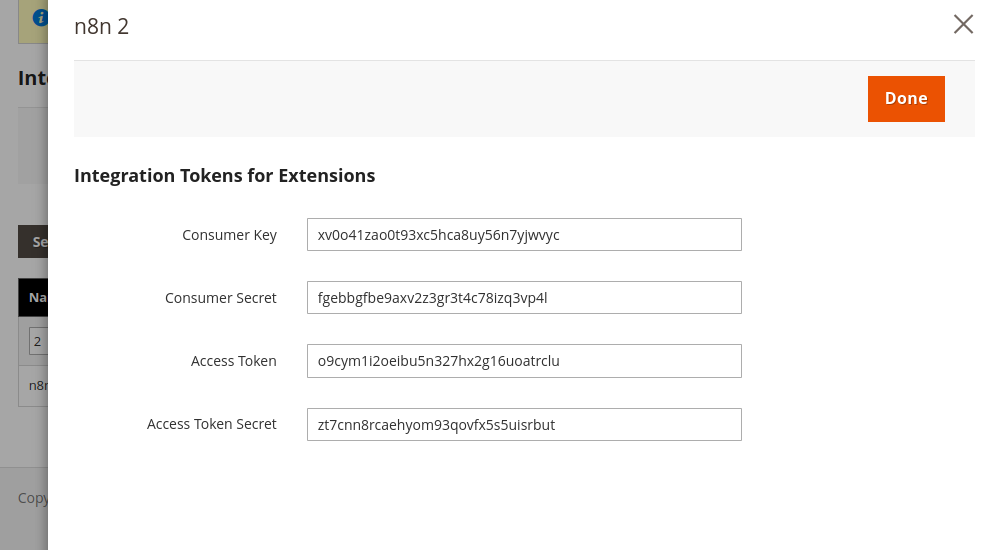
- Click “Allow”
- Copy the Access Token, and save it for use in n8n. That’s the third field down:
![Magento integration before activation]()
The official Magento documentation can go into the details on the other stuff here, but the short version is- it’s for Oauth.
Allowing token authentication in Magento 2 REST API
This reminds me - if you want to use a simple token with Magento 2’s API, you won’t be able to by default until you change one setting. You can read more about that here or just follow these steps:
- Log in to your Magento 2 admin
- Go to Stores > Configuration > Services > OAuth > Consumer Settings > Set: “Allow OAuth Access Tokens to be used as standalone Bearer tokens” to Yes. Or, if you’re a nerd like me, you can use the command line:
1
bin/magento config:set oauth/consumer/enable_integration_as_bearer 1
Working with Magento 2 REST API Endpoints
Do we need to put “API” after every time we write “REST”? Isn’t it implied at this point and redundant? Anyway,
There is a TON to learn about the little nuances of the Magento 2 REST API. I’m not going to go into all of that here, but I will share some tips and basics that I believe are foundational, or most commonly used.
For official how tos, your best bet is to simply use the ReDoc reference, and a tool like Postman to fool around and learn how the API behaves. I highly suggest downloading and importing their OpenAPI spec, which is linked on the landing page of the ReDoc reference.
If you somehow got to this point looking for GraphQL tips - that will be for another time. SwiftOtter has good materials on that though. Here’s a link to their GraphQL course.
Tools
I mentioned Postman, but there are other tools that can be helpful. I use Insomnia for example. It’s a great tool, and I highly recommend it. It’s free, and open source. I also use Postman though, as I have a lot of collections in there too.
The primary help with using these tools is to quickly change the .. everything about the api call. Headers, parameters, body, etc. And for one off stuff that’s as far as you need to go. But when automating- it’s much easier to use your API tool to test the call with details, then copy the CURL for use in n8n.
CURL
This is the secret sauce.
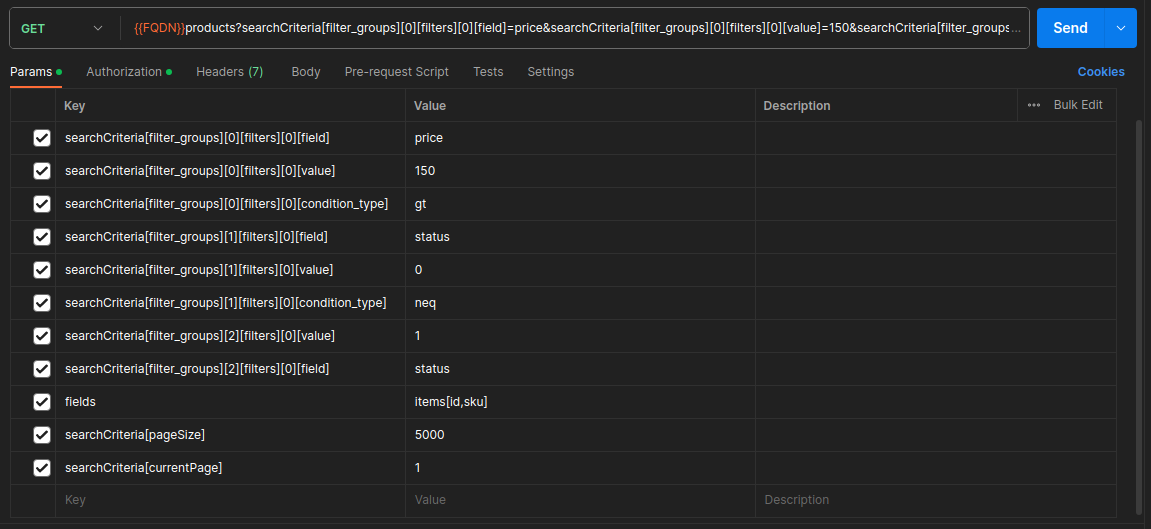
Have you seen how complex Magento 2 REST calls to search endpoints can get?
1
products?searchCriteria[filter_groups][0][filters][0][field]=price&searchCriteria[filter_groups][0][filters][0][value]=150&searchCriteria[filter_groups][0][filters][0][condition_type]=gt&searchCriteria[filter_groups][1][filters][0][field]=status&searchCriteria[filter_groups][1][filters][0][value]=0&searchCriteria[filter_groups][1][filters][0][condition_type]=neq&searchCriteria[filter_groups][2][filters][0][value]=1&searchCriteria[filter_groups][2][filters][0][field]=status&fields=items[id,sku]&searchCriteria[pageSize]=5000&searchCriteria[currentPage]=1
Oh yea, super simple and easy to understand. For granular details on how the filter parameters work, and the logic of AND vs OR in them, the official docs can help: Magento 2 REST API Search Criteria
Tools like Postman are almost essential to deal with query hell like this. It’s much easier to understand when it’s layed out for you:
Now how do we get this from here to n8n? I do not want to type all that in or copy it piecemeal… Well, you’re in luck! Postman and every other API tool has a ‘copy as CURL’ option. In Postman, it’s under the “Code” button:

Copy Paste FTW
Copy that Curl- then click “Import Curl” in the n8n HTTP node:
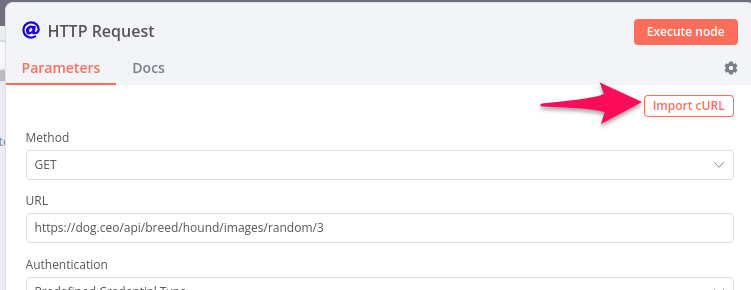
Paste the curl in the box, and click “Import”:
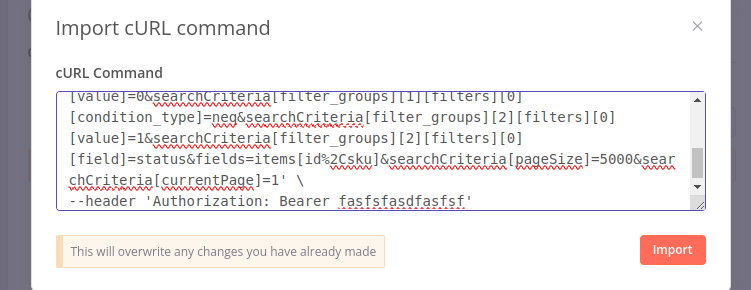
MAGIC
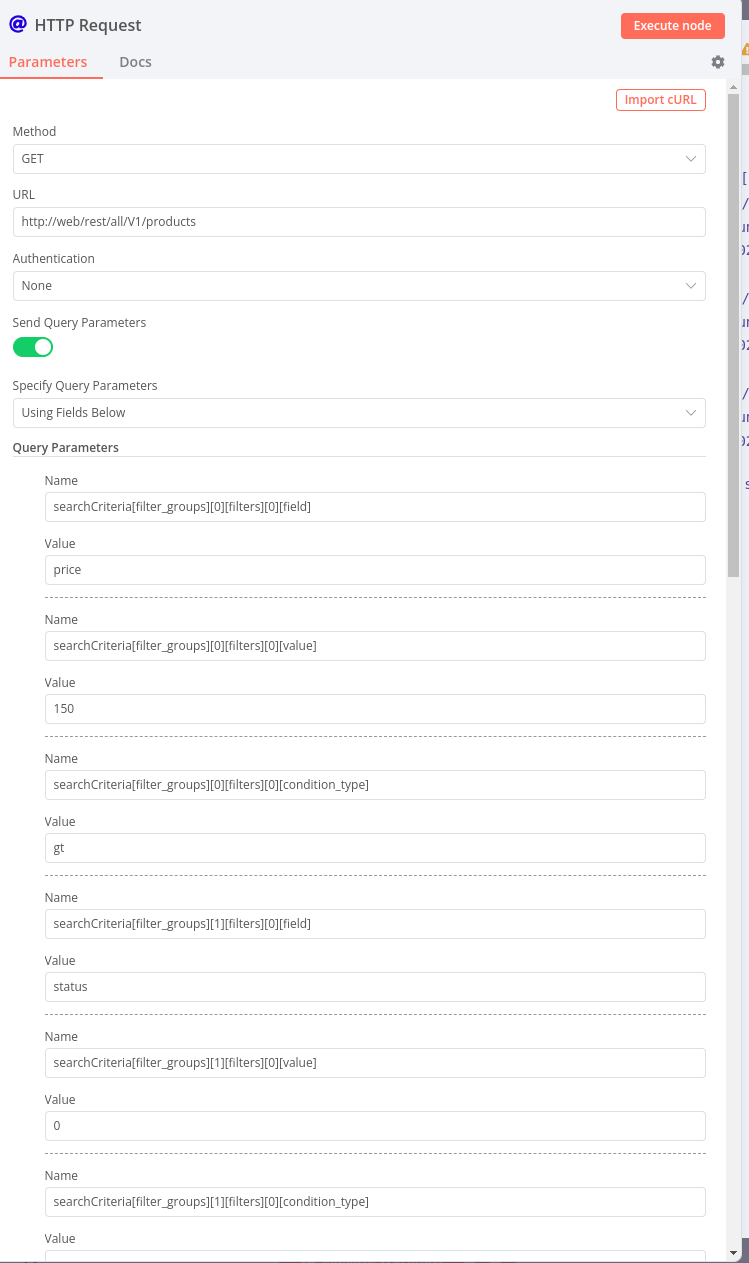
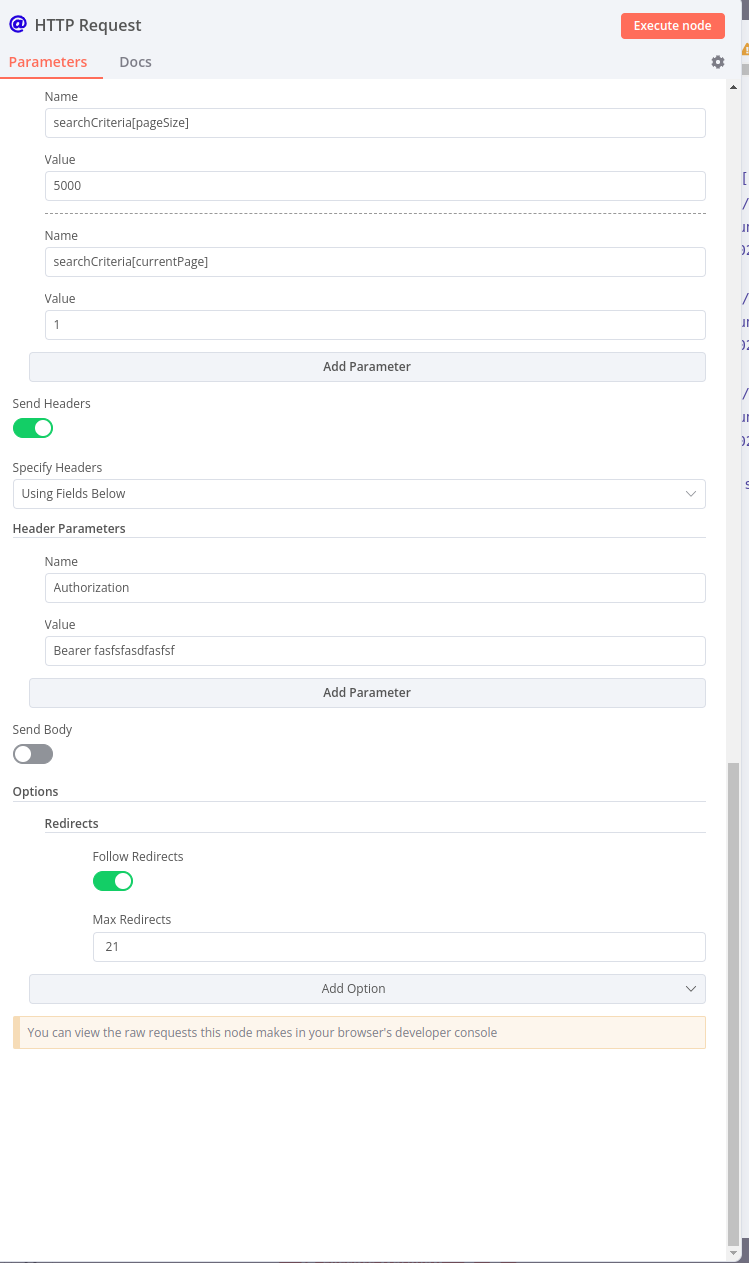
Now we have all of the headers, parameters, and the URL in the node. We can adjust as needed.
At a minimum, I highly recommend you remove the Authorization header, and instead select your Predefined Magento 2 Credential. It will keep your passwords out of the cleartext. So simply toggle off the headers in the node, then at the top use the Authentication dropdown to select your Magento credentials.
TA-DAAAA
The ‘fields’ field
As a closing tip/remark - the REST api has a wonderful feature called “fields”. This allows you to select which fields you want to return in the response. This is great for performance, and for reducing the amount of data you have to parse through. Very similar to GraphQL - but don’t mistake this feature for a replacement of GraphQL.
Official docs are here on this- USE IT.
Conclusion
This took me longer to write than I wanted, otherwise I would have dove into a few more topics like the “fields” parameter, and the “searchCriteria” parameter. But I think this is a good start for anyone looking to use the HTTP node in n8n to connect to the Magento 2 REST API.
I hope you found this interesting!
Comments powered by Disqus.